REVIEW · PALM SPRINGS
Joshua Tree National Park Self-Guided Audio Tour
Book on Viator →Operated by Shaka Guide Apps · Bookable on Viator
Your car turns into the tour guide out here. This self-guided Joshua Tree audio tour is built for offline discovery and GPS turn-by-turn, so you can drive between stops without guessing. I love the hands-free setup (the narration and music cue up as you drive) and the way the route mixes big sights with quick photo stops. One catch: you’re still choosing how long you hike in full desert sun, especially on the longer trails.
Here’s the real value play. It’s priced per group (up to 15 people), so if you’re traveling with friends or family in one vehicle, the cost per person drops fast—then you just budget for what isn’t included: park entry and parking. You also don’t have to rush. The total duration is long, but you can pick the stops you want and skip the rest.
One more practical note: this tour system works through the Shaka Guide app, and it’s best if you download ahead on solid Wi‑Fi. Plan that tiny step well, and you’ll be ready for a day where cell service often feels like a rumor.
In This Review
- Quick hits: what makes this Joshua Tree audio tour useful
- Downloading and using the app when Joshua Tree has no service
- Price and value: $12.79 per group can be a smart deal
- Planning your day: using a south-to-north flow so you see more
- Stop-by-stop: from palm oases to rock formations (and how to do each well)
- Stop 1: Lost Palms Oasis Trail (the long, hot opener)
- Stop 2: Cottonwood Visitor Center (where you handle park basics)
- Stop 3: Ocotillo Patch (quick plant lesson with personality)
- Stop 4: Cholla Cactus Garden (cute look, sharp truth)
- Stop 5: Arch Rock Nature Trail (photo time, plus climbing fun)
- Stop 6: Split Rock Loop Trail (easy-ish effort, big visual payoff)
- Stop 7: Skull Rock (the roadside caution sign you can’t miss)
- Stop 8: Ryan Mountain Trail (your 360-degree reward hike)
- Stop 9: Hall of Horrors (rounded boulders in a strange place)
- Stop 10: Cap Rock Trail (the 1970s story stop)
- Stop 11: Lost Horse Mine (moderate hike + Johnny Lang story)
- Stop 12: Keys View (sunset planning with the San Andreas Fault)
- Stop 13: Barker Dam Trail (know the fork so you don’t wander)
- Stop 14: Wall Street Mill Trail (where the bathrooms help)
- Stop 15: Hidden Valley Nature Trailhead (climbable rocks and photo chances)
- Stop 16: Intersection Rock (short stop, restrooms available)
- Stop 17: Joshua Tree Visitor Center (last info stop before re-entering)
- Stop 18: Joshua Tree National Park Visitor Center (newer exhibits and souvenirs)
- Stop 19: Oasis of Mara (final stroll and a shop break)
- When the audio does the heavy lifting (and when you still need to think)
- Who this tour fits best
- Should you book this Joshua Tree self-guided audio tour?
- FAQ
- How much does the Joshua Tree National Park self-guided audio tour cost?
- Does the tour include the Joshua Tree National Park entrance fee?
- Does the audio tour work offline?
- How long is the tour?
- Are there restrooms along the route?
- How many people can participate in one tour?
Quick hits: what makes this Joshua Tree audio tour useful
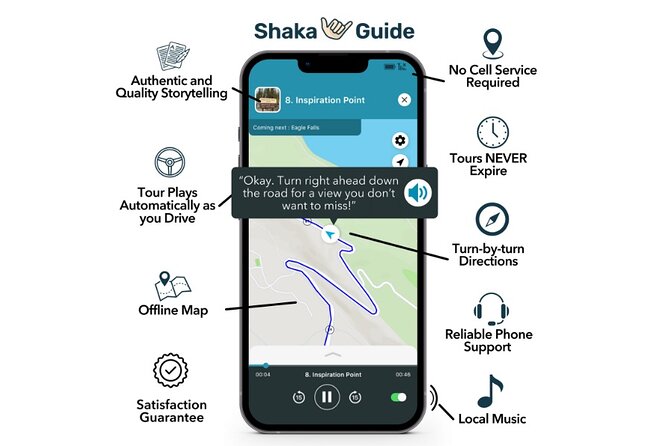
- Offline audio + offline maps mean no data needed once you’re in the park area.
- GPS-activated narration plays automatically while you drive, with turn-by-turn directions.
- One group price up to 15 people keeps it friendly for families and small friend groups.
- You can start, pause, and resume whenever you want, since tours never expire.
- Restrooms are built into the route at multiple visitor centers and select trail stops.
- The route includes both quick pull-offs and real hikes, so you can mix effort levels.
Downloading and using the app when Joshua Tree has no service
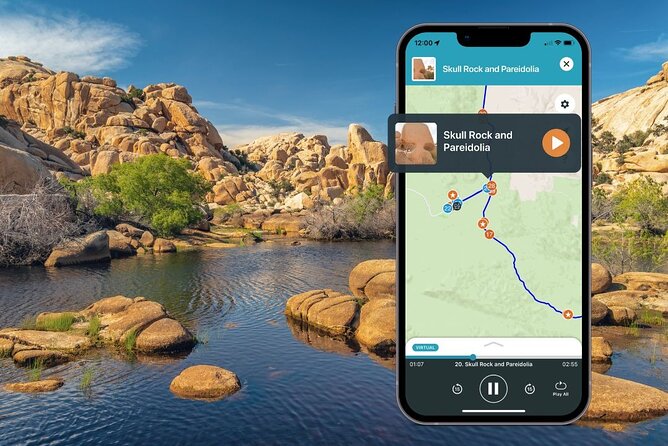
The mechanics are straightforward, and that’s a big deal in Joshua Tree. You’ll download the tour using the Shaka Guide app, then use a redeem code from your email to unlock it. Once it’s downloaded, the audio can run offline, and the map/GPS guidance works without continuous internet.
What I like about this approach: you don’t need to stare at your phone while driving. The tour provides GPS directions and the narration plays automatically as you drive. That keeps you focused on the road, the turns, and the occasional “wait, stop here” moment when a rock formation looks too perfect.
Two practical tips that will save you time:
- Download before you leave town, not after you’re already deep in the park.
- Follow the suggested route and speed for the smoothest experience.
There’s also practical support listed (call/chat/email), which matters when you’re off-grid. Still, the tour is designed to be self-sufficient—offline-first.
You can also read our reviews of more tours and experiences in Palm Springs.


Price and value: $12.79 per group can be a smart deal
The price is $12.79 per group, up to 15 people. That’s the key value detail. This isn’t a per-person ticket where you pay extra just because you brought your whole crew. If you’ve got a 5–10 person group riding together in one vehicle, it becomes a low-cost way to add storytelling and directions without hiring a guide.
But don’t forget what isn’t included:
- Joshua Tree National Park entrance fee
- Parking fees
- Meals and refreshments
- Private transportation
The good news is that the route itself points you to a practical moment to handle park needs. One of the early stops is the Cottonwood Visitor Center, where you can pay the park fee and use restrooms. So the tour doesn’t just throw you into hiking; it helps you get the logistics handled early.
When this is worth it: if you want a flexible day and you like learning while you go, this price is easy to justify. When it might not be worth it: if you only want one very short walk and you already know the park well, a paid audio tour may feel like extra.
Planning your day: using a south-to-north flow so you see more
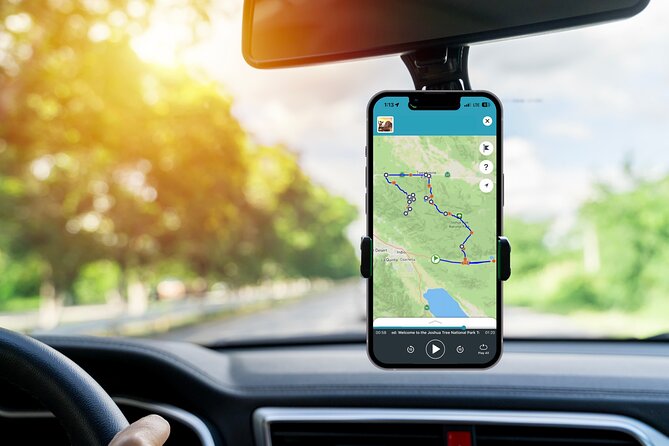
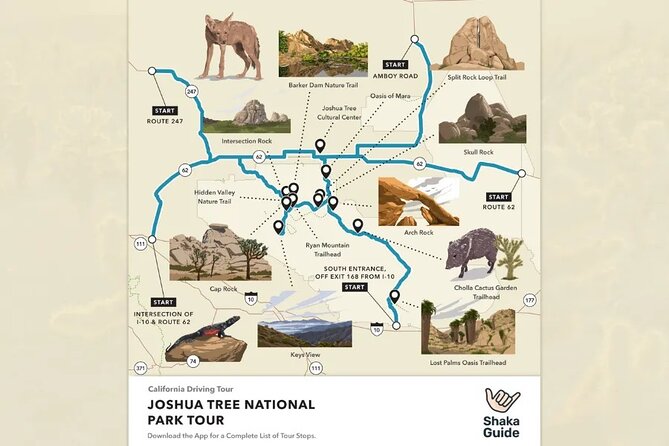
One tip that’s worth taking seriously is the direction strategy: enter from the south side and travel north, then west one way (or do the reverse). The tour’s stop order naturally supports a “work your way across” style of day.
Why that helps: Joshua Tree isn’t small, and driving time adds up. A route that avoids backtracking helps you fit in more of the good stuff while still having breathing room at trailheads.
Also, that full “about 14 hours 37 minutes” duration is more of a maximum if you do everything in sequence. Real life looks different. You can treat this like a menu:
- Do a long hike if you’re feeling strong (like Ryan Mountain or Lost Palms Oasis Trail).
- Add a couple short stops for plant and rock highlights.
- Save sunset views for Keys View if you time it right.
Stop-by-stop: from palm oases to rock formations (and how to do each well)
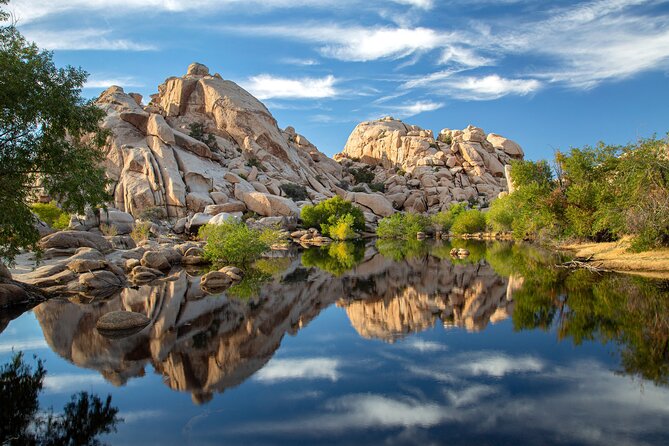
Stop 1: Lost Palms Oasis Trail (the long, hot opener)
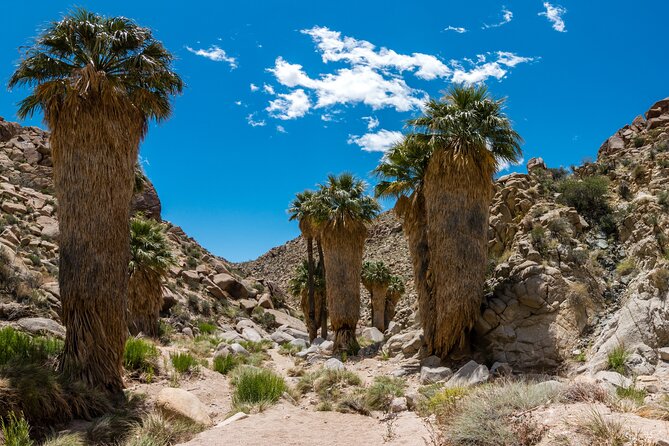
This is a long hike through Joshua Tree’s southern Colorado Desert. It’s scenic, and the payoff is the palm oasis at the end. The drawback is right in the name of the reality check: little to no shade. Spring through fall can be brutally hot.
Bring water and sun protection, and don’t treat this as a “casual stroll.” If you want the scenic wow without committing to the full hike, you can also just take a brief look at the oasis from the trailhead, then move on.
Best way to use it:
- Start early if you can.
- Give yourself a clear turnaround point so you don’t get stuck forcing progress in heat.

Stop 2: Cottonwood Visitor Center (where you handle park basics)
This is a smart logistics stop. You can pay the park fee here, use restrooms, and ask rangers questions. That last part matters: rangers can help you connect the day’s conditions to the hikes you’re choosing.
Even if you’re not asking anything, it’s worth the break. It’s a clean reset before you head into more walking.
Stop 3: Ocotillo Patch (quick plant lesson with personality)
This short stop is all about the ocotillo plant. The tour explains why it looks the way it does and what makes it quirky enough to deserve a stop.
This is the kind of moment that turns a drive into a field lesson. It’s also a good energy-saver between longer stretches.
Stop 4: Cholla Cactus Garden (cute look, sharp truth)
Cholla cacti are famous for fooling your brain. Teddy Bear chollas look fuzzy and friendly, but they’re anything but. The short nature trail winds through thousands of mature chollas, so the big rule is simple: walk carefully, and wear good close-toed shoes.
No complicated gear needed. Just don’t treat the plants like props. If you’re with kids or you’re careless with your step, keep this one slower than you think you need.
Stop 5: Arch Rock Nature Trail (photo time, plus climbing fun)
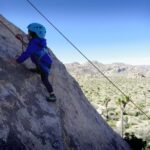
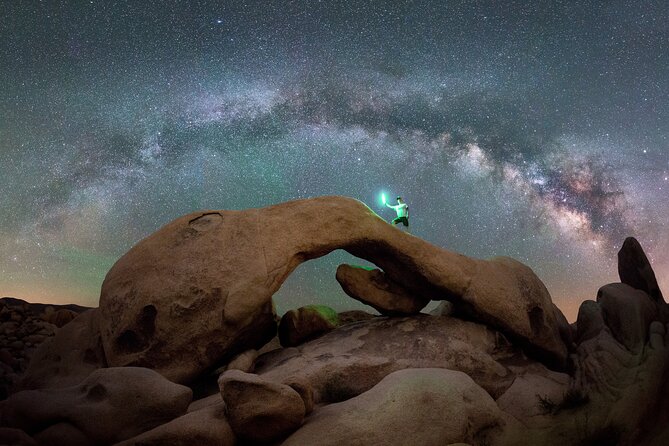
Arch Rock is a large natural arch and a popular photographer spot. The trail gives you a chance to get angles and then move around the rock areas for fun climbing.
Do be mindful here. Climbing is part of the appeal, but desert rock surfaces can be uneven. If you’re not into scrambling, you can still enjoy the views without pushing beyond your comfort.
Stop 6: Split Rock Loop Trail (easy-ish effort, big visual payoff)
This loop is described as easy and it takes you through iconic rock formations. It’s a good “I want movement, but not a suffer-fest” option.
If you’ve already done Lost Palms, this may feel like a recovery leg. If you skipped Lost Palms, this is a solid warmup to the more strenuous choices later.
Stop 7: Skull Rock (the roadside caution sign you can’t miss)
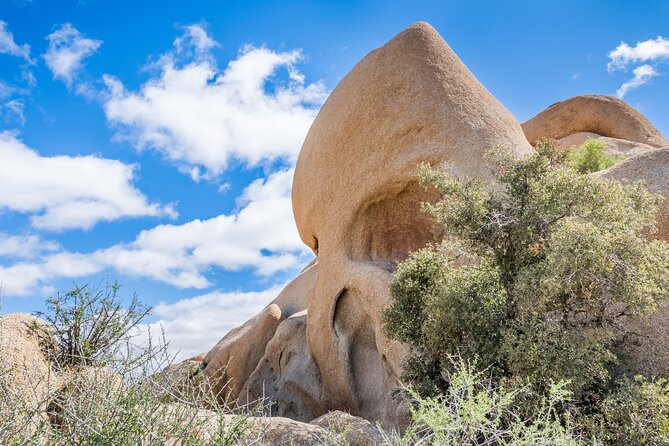
Skull Rock is shaped like a melted skull in desert heat—one of those formations people stop for instantly. Here’s the practical warning: park carefully because the roadside plants are fragile.
That means don’t rush your parking. Also, once you step out, keep your feet on durable ground and avoid shortcuts that trample nearby vegetation.
Stop 8: Ryan Mountain Trail (your 360-degree reward hike)
Ryan Mountain is one of the park’s best hikes, and it earns that reputation with a 360-degree view of the valley and surrounding area. It’s listed as about 1 hour 30 minutes, which makes it a real hike but not an all-day commitment like some bigger desert routes.
If you like big viewpoints, this is one of the stops you plan around. Think of it as your “bring my camera” anchor point.
Stop 9: Hall of Horrors (rounded boulders in a strange place)
Hall of Horrors is another rock formation stop. It features rounded gneiss boulders right in the middle of the desert.
This is quick—about 10 minutes—but it’s a useful contrast. After you’ve been in sharp-edged and spiky zones, the soft-rounded shapes here feel different in a good way.
Stop 10: Cap Rock Trail (the 1970s story stop)
Cap Rock includes one of those human-interest desert oddities: an attempted (and ill-fated) 1970s funeral. The formation itself is also a classic gneiss scene.
This is best if you like learning tiny pieces of the park’s “wait, really?” lore while you look around. The stop is short, so it works as a break without losing the flow.
Stop 11: Lost Horse Mine (moderate hike + Johnny Lang story)
This is a moderate-level hike to Lost Horse Mine. It connects the geology and the trails to a gold mining tale where gold ore was mined and famously stolen by Johnny Lang.
As a stop, it’s compelling because it’s not just a viewpoint. You’re walking into the context of human attempts in a place that doesn’t really make things easy.
Time note: about 1 hour 30 minutes. That’s enough time to feel like you did something, without turning the day into a grind.
Stop 12: Keys View (sunset planning with the San Andreas Fault)
Keys View is where you go for gorgeous sunset views over Palm Springs. You can also see the San Andreas Fault, which adds a geologic punch to the golden hour.
If you want photos with the city glow and the fault view in the same session, treat this as your timing checkpoint. It’s listed for about 30 minutes—short enough to stay flexible, long enough to enjoy the light.
Stop 13: Barker Dam Trail (know the fork so you don’t wander)
Barker Dam Trail is a fun one, and the guide includes a very specific routing note. If you take the trail counterclockwise, you should turn left at the fork just before the petroglyphs to return to the Barker Dam parking lot. If you continue straight, you’ll go toward the Echo T parking lot, which is further away.
That kind of detail saves you from a common desert day annoyance: getting tired and realizing you’ve walked yourself into a longer drive just because you missed a junction.
Stop 14: Wall Street Mill Trail (where the bathrooms help)
Wall Street Mill Trail is about 1 hour, and vault toilets are available. It’s one of those practical stops where you don’t have to worry as much about timing your bathroom needs.
Also, the name alone hints at the kind of mining/industrial story you’ll pick up from the narration while you walk.
Stop 15: Hidden Valley Nature Trailhead (climbable rocks and photo chances)
Hidden Valley is described as one of the park’s most popular hikes. It has rock formations you can climb on, plus desert flora that makes for good pictures.
This is a great choice if you want activity that feels playful rather than purely strenuous. If you’re traveling with different fitness levels, this one can work well because people can set their own pace and decide how much climbing to do.
Stop 16: Intersection Rock (short stop, restrooms available)
Intersection Rock is a quick stop (about 10 minutes) and vault toilets are available. It’s not the longest leg, but it’s valuable as a reset point between hikes and overlooks.
Stop 17: Joshua Tree Visitor Center (last info stop before re-entering)
This stop is short—about 5 minutes—but it’s useful. It’s the last chance to grab information, use a flush toilet, or grab a quick bite before you re-enter the park.
If you plan to do a couple more stops after this, this is the point where you top off water, check what you feel like doing next, and then roll forward.
Stop 18: Joshua Tree National Park Visitor Center (newer exhibits and souvenirs)
The Joshua Tree National Park Visitor Center is listed for about 20 minutes. You can ask questions, view exhibits, and maybe buy a souvenir.
Even if you’ve already listened to the audio stories, exhibits can add context fast—especially if you want a better mental map of what you just saw.
Stop 19: Oasis of Mara (final stroll and a shop break)
Oasis of Mara includes restrooms, a gift shop, and a brief trail around an oasis. It’s about 30 minutes, and it’s a satisfying ending because it brings you back to the theme of water and survival in a dry place.
This stop is also a good “we’re tired but we still want one more small walk” option.
When the audio does the heavy lifting (and when you still need to think)
The tour’s offline audio narration includes stories, travel tips, and music, and it plays automatically while you drive. That’s what makes it feel hands-free rather than like you’re managing content.
GPS directions also remove the stress of deciding which turn makes sense next. In a park full of pull-offs and trailheads, that matters.
But you still need to do the part the app can’t: choose your effort level. The tour includes both long hot hikes and short photo stops, so your day quality depends on your choices.
If you’re visiting in hotter seasons, treat water and sun protection like non-negotiable gear. For the cactus areas, treat footwear like protection for your plans, not just comfort.
Who this tour fits best
This is a great fit if you want:
- Flexibility to pick stops and skip others
- An offline audio guide that works without cell service
- A low-cost add-on for a vehicle-based group (up to 15)
It’s also a good option for people who don’t want a fixed schedule. You can start and explore on your own time, and tours never expire, so you can download once and use later.
Where it may not be ideal:
- If you want a live, ranger-led experience with ongoing Q&A at every stop.
- If your group is mostly mobility-limited and you won’t be able to do the hikes; the route works better when at least some people are willing to walk.
Should you book this Joshua Tree self-guided audio tour?
I’d book it if you’re planning a Joshua Tree day that mixes driving, short stops, and at least one real hike. The offline audio + GPS setup makes the park feel easier, and the price per group is a fair deal for a vehicle full of people.
I wouldn’t book it if you’re only looking for a couple quick pull-offs and you already have a plan that doesn’t need directions or storytelling. In that case, you might prefer building your own route with only free resources.
One last decision tip: decide first which hike you want most (Lost Palms Oasis Trail, Ryan Mountain, or Lost Horse Mine), then use the audio stops as bonuses around it. That approach turns the whole day into something you control.
FAQ
How much does the Joshua Tree National Park self-guided audio tour cost?
It costs $12.79 per group, up to 15 people.
Does the tour include the Joshua Tree National Park entrance fee?
No. The park entrance fee is not included. You can pay the park fee at the Cottonwood Visitor Center.
Does the audio tour work offline?
Yes. The tour includes an offline map and audio narration can be used without needing continuous Wi‑Fi or data.
How long is the tour?
The full experience is listed as about 14 hours 37 minutes, but you can pick the stops you want and skip the ones you don’t.
Are there restrooms along the route?
Yes. The tour lists restrooms at several points, including Cottonwood Visitor Center, Joshua Tree Visitor Center, Joshua Tree National Park Visitor Center, Oasis of Mara, and vault toilets at Wall Street Mill Trail and Intersection Rock.
How many people can participate in one tour?
The pricing is per group for up to 15 people, and the tour is described as private for just your group.