REVIEW · MOAB
Milky Way Photography in Arches National Park
Book on Viator →Operated by Rock Light Photo Tours · Bookable on Viator
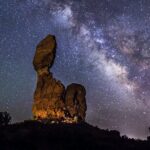
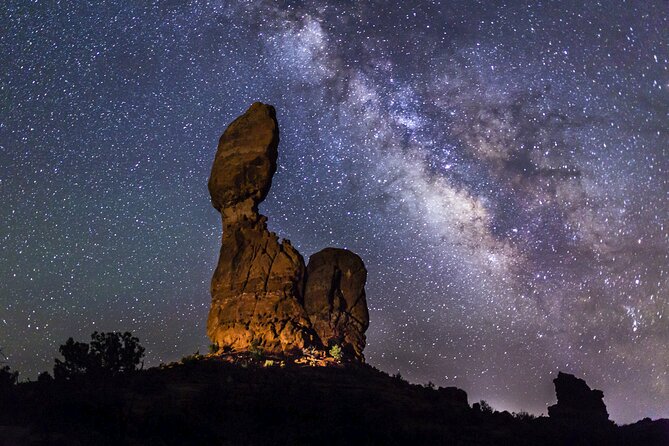
Seeing the Milky Way in Arches feels unreal. This tour is interesting because you get a quick, practical photo settings crash course first, then you head into the park for at least two Milky Way photo locations in an internationally recognized dark sky area.
I like that the small group format (max 4) keeps the night from feeling chaotic, and I also like that the guide teaches you how to work with your own DSLR or mirrorless gear instead of just pointing you toward a view.
One thing to think about: timing. In March through May, the Milky Way doesn’t show until after midnight, so you’re looking at late-night starts. If you hate wee hours or struggle with night vision, this might be a tough fit.
In This Review
- Quick hits before you plan your night
- Why this Milky Way tour works (even if it’s your first astro shoot)
- The 3.5-hour flow: what happens before and during the Milky Way shots
- Meeting in Moab (daylight skills, then nighttime practice)
- Stop 1: Arches National Park (and the first run at the sky)
- Moving between locations (why the tour doesn’t stay put)
- Timing: when the Milky Way shows up (and when you’ll be out past midnight)
- Camera and lens requirements: what you need to bring (no mystery gear)
- What the instruction covers (and how it actually helps your photos)
- Group size, physical comfort, and the reality of night outdoors
- Snacks and water: small comforts that keep your night on track
- Price and value: is $275 really fair?
- So where do you fit? Who this tour suits best
- Should you book Rock Light Photo Tours for the Milky Way in Arches?
- FAQ
- FAQ
- How long is the Milky Way Photography in Arches National Park tour?
- How much does the tour cost?
- Where does the tour start and end?
- Does pickup from Moab or nearby areas happen?
- What’s included in the tour price?
- Do I need to bring my own camera and tripod?
- What camera settings and gear should I plan to have?
- Can I photograph the Milky Way with a cell phone?
- When can I see the Milky Way during the year based on the tour timing?
- What is the cancellation window?
Quick hits before you plan your night
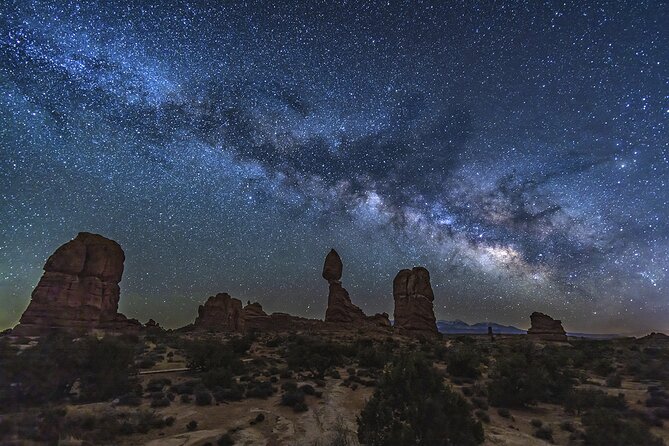
- Dark-sky shooting in Arches National Park: You’re not just visiting; you’re photographing a real astrophotography hotspot.
- A real settings lesson first: You’ll learn what to set on your DSLR or mirrorless camera before you’re under the stars.
- Two (or more) Milky Way locations: Expect the guide to move you to improve composition and results.
- Small group, max of 4: Better attention when you’re stuck dialing in focus or exposure.
- You bring the camera (and ideally a lens): The tour is instruction plus night shooting, not equipment rental.
Why this Milky Way tour works (even if it’s your first astro shoot)
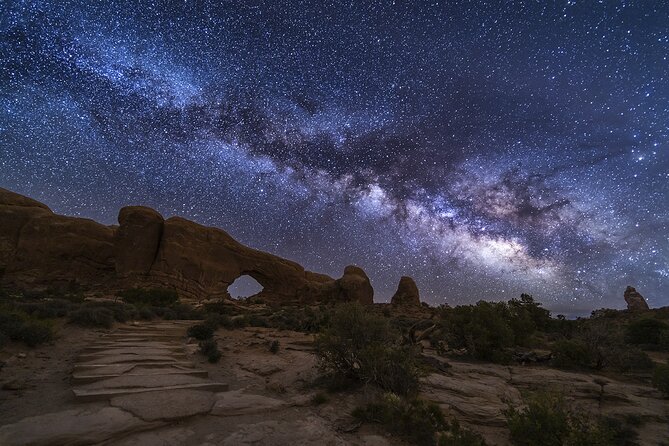
If your only view of the night sky came from cities, this tour can change your expectations fast. Arches is famous in the daytime, sure—but at night, the sky does the heavy lifting. With dark-sky conditions, you can actually photograph that cloudy band of light you normally only spot with your eyes.
What I like about this setup is the order of operations. You start with a quick crash course on Milky Way settings, then you go out to shoot. That’s the difference between fumbling in the dark and getting results you can build on. The guide focuses on how to use your camera (DSLR or mirrorless) rather than treating you like a passive spectator.
You’ll also feel the value in the small-group size. With a maximum of 4 travelers, it’s easier to get help when your exposure is too bright, your stars look like smears, or your lens won’t cooperate. You’re less likely to lose half the night waiting your turn.
You can also read our reviews of more tours and experiences in Moab.
The 3.5-hour flow: what happens before and during the Milky Way shots
This experience runs about 3 hours 30 minutes and starts in Moab, ending back at the same meeting spot. The tour uses transport/pickup options (if offered for your booking), and the night shooting happens inside Arches National Park.
Here’s the practical rhythm you can expect:
Meeting in Moab (daylight skills, then nighttime practice)
You meet at the Moab Information Center, 25 E Center St, Moab, UT 84532. Starting in town matters because you can prep your gear without rushing in from the highway shoulder. You also get your headlamp ready (a red setting is recommended), which is a small detail that pays off quickly once it’s truly dark.
Stop 1: Arches National Park (and the first run at the sky)
Once you’re in the park, you’ll begin photographing the Milky Way. The plan is to shoot in at least two locations. That’s a big deal because astrophotography isn’t just about pointing upward—it’s about controlling composition. Different vantage points help you balance stars, Milky Way structure, and Arches rock formations so your images look intentional instead of accidental.
Even if you’ve never done night photography, the guide’s instruction helps you avoid the most common first-night mistake: using default camera settings and hoping the camera will figure it out.
Moving between locations (why the tour doesn’t stay put)
When the guide relocates you, it’s usually for one of these reasons:
- you’ll get a better angle on the Milky Way over the rock formations
- you can reduce light pollution impact in the frame
- you’ll have a chance to refine focus and exposure with new framing
For your photos, that movement is part of the value. For your sanity, it’s also a reminder to keep tweaking settings instead of getting stuck on one “maybe it’ll work” spot.
Timing: when the Milky Way shows up (and when you’ll be out past midnight)
This tour depends heavily on season. Here’s the key info you should plan around:
- March through May: the Milky Way doesn’t appear until after midnight, so the tour begins with a late-night pickup. During this time window, it’s offered as a standalone night photography tour.
- Fall: the operator offers a combo sunset + night tour instead of an all-night-only format.
Why you should care: if you book with the wrong expectations, the experience can feel harder than it needs to be. You’re not just traveling to Arches—you’re choosing a specific way to spend your night based on when the sky cooperates.
Camera and lens requirements: what you need to bring (no mystery gear)
This is not a “we hand you a camera and you push a button” tour. The core premise is instruction for your equipment.
You should bring:
- your DSLR or mirrorless camera capable of at least 3200 ISO
- a sturdy tripod
- a wide-angle lens that can open to f/3.5 or lower
- a headlamp or flashlight, ideally with a red setting
Lens guidance (from the tour’s specs):
- Full frame: 14mm to 35mm
- Crop sensor: 10mm to 24mm
If you’re considering a phone-only approach: the tour notes that late-model iPhones or other advanced cell phone cameras may be able to capture the Milky Way. That doesn’t guarantee great results, but it does mean you can still enjoy the experience even without a full camera setup.
Also: if you don’t have a tripod, the guide may be able to loan a spare. Don’t count on it blindly—message ahead if you need help.
What the instruction covers (and how it actually helps your photos)
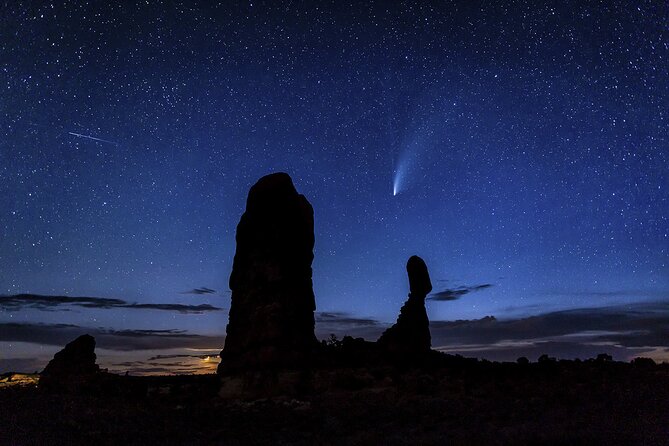
The included lesson is about capturing the Milky Way using your camera. That usually translates into practical steps like exposure settings, how to think about ISO, and how to set up so you’re not fighting your gear while time is ticking.
The big benefit is that you’ll know what you’re changing and why. In your first night of astrophotography, that matters more than fancy gear. Even if you’re a total beginner, the tour is built to get you moving toward workable images fast.
One detail that comes through in operator feedback: people often arrive not knowing their camera at all. The guide support helps you start with the basics and then refine. In past departures, guides named Colin Young and Jeremy were praised for being patient and helpful with camera questions—especially for first-time shooters.
Group size, physical comfort, and the reality of night outdoors
The tour has a maximum of 4 travelers, which is great for attention but also means you’ll want to show up prepared. This is a night experience, so you’ll likely be dealing with:
- cold air (even in warmer seasons, nights can feel cooler)
- moving between spots in low light
- setting up and troubleshooting your tripod
The activity is listed as requiring moderate physical fitness. That doesn’t mean it’s a hike for trained athletes, but it does mean you shouldn’t expect a fully flat, sit-in-a-chair night.
Night vision also matters. The tour notes it’s not recommended for travelers with poor night vision. If you know you struggle in the dark, plan carefully.
Snacks and water: small comforts that keep your night on track
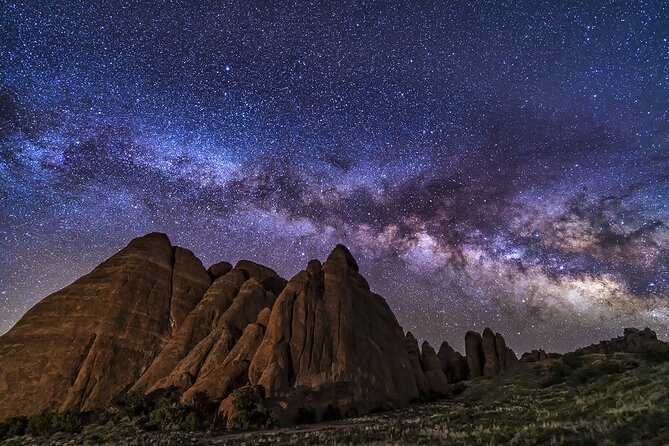
Between camera setup and shooting, you’ll appreciate the included basics:
- snacks (snack bars and/or trail mix, with gluten-free options)
- bottled water, with a cooler setup so you can refill reusable bottles
This may sound minor, but for a night tour it’s actually smart. You don’t want your only energy plan to be “hope I can find something open later.”
Price and value: is $275 really fair?
At $275 per person for about 3.5 hours, this is a premium add-on. The value comes from three places:
1) Dark-sky location access plus time on-site. You’re going into Arches after dark specifically to photograph the Milky Way, not just to admire the sky.
2) Instruction built around your camera. The lesson is included and you’re supported while you apply it during the session. For beginners, that can be the difference between usable photos and a memory card full of disappointments.
3) Small group cap (max 4). That attention is the kind you can’t scale cheaply. It’s also why this tour is often booked ahead (on average, about 57 days in advance).
If you already know your settings and have your own workflow, you might feel like you’re paying mostly for guidance and positioning. If you don’t, it’s easier to see the price as paying for results.
So where do you fit? Who this tour suits best
This works best if:
- you want photos, not just stargazing
- you have a DSLR or mirrorless camera (or an advanced phone and a desire to try)
- you’re okay with late-night starts in March–May
- you want a guide to help you avoid common exposure and focus mistakes
It may be less ideal if:
- you strongly dislike nighttime (especially after midnight)
- you have poor night vision
- you don’t have the required gear (especially a tripod and wide angle), unless you’re relying on the tripod loan possibility
Should you book Rock Light Photo Tours for the Milky Way in Arches?
If you’re chasing that once-in-a-lifetime “how is this even real?” sky, I think the booking makes sense—especially if you’re a beginner. The combo of an instruction lesson plus moving you to multiple Milky Way photo locations is the core reason this type of tour can outperform a DIY night.
But be honest with yourself about timing. If you’re visiting in March–May, the Milky Way waits until after midnight. If that’s a dealbreaker, consider dates when the operator can offer a different format (like the sunset + night combo in fall).
My practical advice: if you book, do your homework on your own camera. Bring your tripod, confirm your lens meets the f/3.5-or-lower wide angle guidance, and plan on using a red light so you don’t ruin your own night vision.
FAQ
FAQ
How long is the Milky Way Photography in Arches National Park tour?
It runs about 3 hours 30 minutes (approx.).
How much does the tour cost?
The price is $275.00 per person.
Where does the tour start and end?
It starts at the Moab Information Center, 25 E Center St, Moab, UT 84532, USA, and ends back at the same meeting point.
Does pickup from Moab or nearby areas happen?
Pickup is offered.
What’s included in the tour price?
You get snacks (with gluten-free options), bottled water (with a cooler for refills), and instruction on how to capture the Milky Way with your DSLR or mirrorless camera.
Do I need to bring my own camera and tripod?
Yes. You should bring your own DSLR or mirrorless camera and a sturdy tripod. The operator may be able to loan a spare tripod if you do not have one.
What camera settings and gear should I plan to have?
You should have a DSLR or mirrorless camera capable of shooting at least 3200 ISO and a wide-angle lens (14mm to 35mm on full frame, or 10mm to 24mm on crop) that can open to at least f/3.5 or lower. A headlamp or flashlight (red setting best) is also recommended.
Can I photograph the Milky Way with a cell phone?
Late-model iPhones or other advanced cell phone cameras may be able to capture the Milky Way, and non-camera visitors can still enjoy the tour.
When can I see the Milky Way during the year based on the tour timing?
From March through May, the Milky Way does not appear until after midnight, so the tour has a late-night start. During fall, the operator offers a combo sunset + night tour.
What is the cancellation window?
You can cancel up to 24 hours in advance for a full refund.