REVIEW · WASHINGTON
Self Guided Driving Audio Tour of Mount Rainier National Park
Book on Viator →Operated by GuideAlong (GyPSy Guide) · Bookable on Viator
Mount Rainier is huge, so you need a guide. This self-guided driving audio tour strings together the park’s best moments—from the Nisqually Entrance to Paradise viewpoints—with location-based stories that play as you reach each stop. I like that it works offline, so you’re not stuck hunting for cell service while the mist rolls in.
What I really like is the automatic narration timing. The audio starts right before you hit the point of interest, and the tone is personable, with humor mixed in—plus practical tips about where it’s worth pulling over. The second win is how it helps you plan your time without taking control away; you can stop for short walks, do a hike, then rejoin the drive when you’re ready.
One drawback: this is a driving tour with lots of optional legs, so if you try to do every hike back-to-back you could run out of steam. Also, it only works well if your phone is ready to go, so bring a charger and make sure it’s topped up before you start.
In This Review
- Key highlights to know before you go
- Why a GPS audio loop works so well at Mount Rainier
- Price and value: $16.99 for up to 8 people
- How to set up GuideAlong before you hit the road
- Your route in practice: from Nisqually Entrance toward Paradise
- Stop-by-stop: Nisqually Entrance, Tahoma Creek, and Twin Firs Loop
- Longmire Museum and the Carter Falls lead-in
- Comet Falls and Christine Falls: choose your waterfall intensity
- Ricksecker Point, Frog Heaven, and the Tatoosh Range
- Narada Falls: one of the easiest big waterfalls
- Unicorn Peak and the Nisqually Vista Trail: when you’re ready for effort
- Inspiration Point and Reflection Lakes: the clear-weather payoff
- What makes this audio tour worth your time on a first Mount Rainier visit
- Should you book this self-guided Mount Rainier audio tour?
Key highlights to know before you go

- GPS-triggered stories that autoplay as you approach each location
- Offline-friendly downloads in the GuideAlong app (works without internet after that)
- 85+ audio points built for first-timers who want context fast
- A practical route through Nisqually, Longmire, Paradise-area waterfalls, and classic viewpoints
- Stop-and-go flexibility, so you can match the day’s weather and your energy
Why a GPS audio loop works so well at Mount Rainier
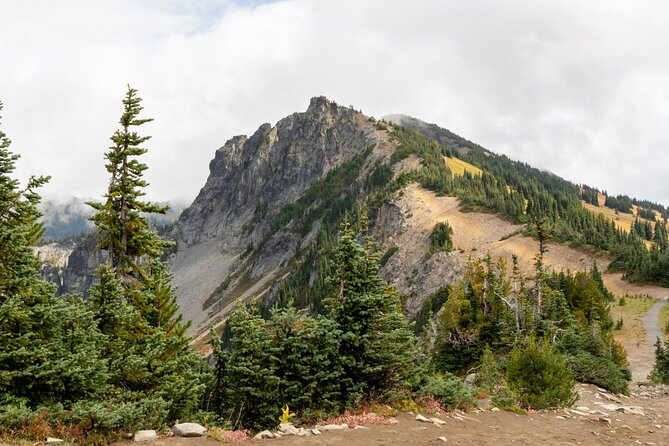
Mount Rainier National Park is gorgeous—but it can also feel like a blur of roads, parking lots, and trails. This tour is designed for the way you actually visit: you drive, you park, you walk for a bit, then you get back in the car and keep moving.
The smartest part is the timing. Instead of forcing you to scroll or guess when to listen, the audio plays using your phone’s GPS as you arrive. That means you can look at what’s in front of you right away—whether it’s a waterfall drop, an old-growth forest scene, or a ridge view to the Tatoosh Range.
Another plus: you’re not locked into one rigid schedule. You control when you start, stop, and resume. If the day turns cloudy, you can shorten the hike plan and still get the key viewpoints and stories.
You can also read our reviews of more tours and experiences in Washington.

Price and value: $16.99 for up to 8 people
For $16.99 per group (up to 8), this is built for families and small squads who want a guided feel without paying per person. Since it’s one purchase covering everyone in the vehicle, the math gets easier fast if you’re traveling with 3–7 people.
And most of the “big ticket” experiences here don’t depend on paid add-ons. Many stops are marked as admission free, including major viewpoint areas and key park sites. That makes the audio tour the main cost, rather than something that stacks on top of expensive entry fees.
One practical way to think about value: if the audio helps you skip one long detour that wouldn’t have paid off, it’s already doing its job. The tour’s job is guidance—helping you spend your time where the views and stories actually connect.
How to set up GuideAlong before you hit the road
This is powered by GuideAlong (GyPSy Guide). After you book, you get an email/text with instructions to download the tour voucher and then the tour itself in the GuideAlong app under My Tours.
Plan on doing the heavy lifting before you go:
- Download the tour over Wi‑Fi or cellular data first
- Use the same Apple or Google account you redeemed with
- Bring a USB/C car charger and top off your phone before the drive
Once downloaded, you don’t need internet or cell service for the audio to run. That matters a lot at Mount Rainier, where signals can be spotty and the weather can change fast.
Also note the tour runs on local park day hours shown for the end point at Sunrise Visitor Center (6:00 AM–9:00 PM, daily in the listed seasonal window). In plain terms: start early if you want parking options and time for hikes.
Your route in practice: from Nisqually Entrance toward Paradise

The flow of the tour is smart for a first visit. You begin at the Nisqually Entrance area, then you work through Longmire-style history and the park’s creek-and-forest side. From there, you shift into the waterfall and viewpoint zone around Paradise, then finish with classic views like Reflection Lakes and Inspiration Point.
The experience is about rhythm. You’ll get short audio segments that guide you to:
1) where to look
2) what to notice
3) whether a pull-off or quick walk is worth your time
That rhythm is exactly what makes the tour feel helpful rather than annoying. It’s not just facts; it’s cueing you to see the park the way it wants you to see it.
Stop-by-stop: Nisqually Entrance, Tahoma Creek, and Twin Firs Loop
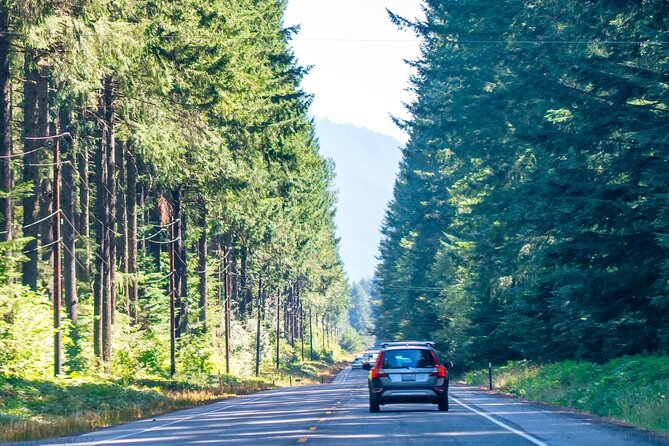
Stop 1: Nisqually Entrance (starting gateway)
This is the southwestern gateway into the park, marked by a rustic log entrance. You’re at a natural launch point for drives toward Longmire, Paradise, and other popular areas. The audio here helps you get oriented fast—so you understand you’re not just driving randomly, you’re entering a system of roads leading to different ecosystems.
Stop 2: Tahoma Creek (glacial water through the forest)
Tahoma Creek is fed by Tahoma Glacier, so what you hear and see is tied to glacial meltwater carving through forested terrain. The audio highlights the idea that glacial runoff is a reminder of the mountain’s volcanic origins, not just pretty water.
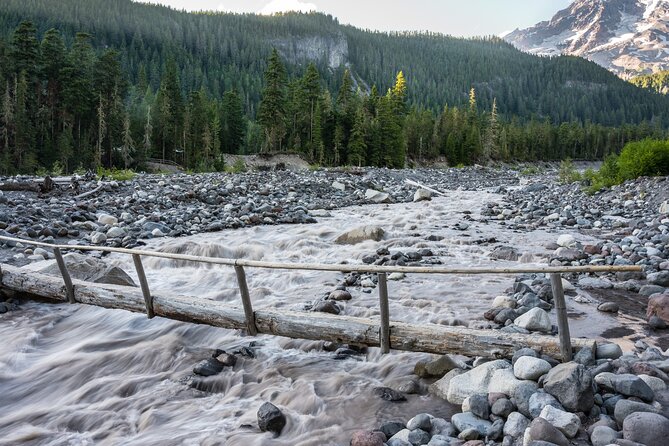
You might notice the trail follows the creek and can involve suspension bridges. This one is more about feel than speed: the sound of water, the mess of sediment, and the sense of power behind the scene.
Stop 3: Twin Firs Loop Trail (easy old-growth walk)
This is a short 0.4-mile loop and one of the easiest “stretch your legs” stops in the route. It’s designed for families and casual walkers, with towering firs, cedars, and hemlocks and a mossy forest floor. Interpretive signs make this a good stop if you want your audio to connect to what you’re literally walking through.
Small consideration: even easy trails can take time if crowds build up or you’re stopping for photos. Still, it’s a great use of a 20–40 minute window.
Longmire Museum and the Carter Falls lead-in
Stop 4: Longmire (museum + orientation)
Longmire Museum sits in the Longmire Historic District in a rustic log building and acts as both a museum and a visitor information hub. The exhibits cover natural and cultural history, including park geology, wildlife, and early settlers and explorers.
If you’re the type who likes context before you hike, this is a smart place to do it. Even if you’re mostly here for waterfalls, understanding the park’s basics makes every later view feel more meaningful.
Stop 5: Carter Falls Trailhead (2.2 miles round trip)
Carter Falls is reached via a 2.2-mile round-trip hike along the Nisqually River area and Paradise River corridor. The audio cues you toward the gradual ascent through dense forest and the chance for river views plus occasional Mount Rainier glimpses.
It’s described as relatively easy, but there is still an uphill push. If you’re traveling with kids, choose pace over speed. If you’re short on time, you may treat it as a “half the trail” day and still get value from the experience.
Comet Falls and Christine Falls: choose your waterfall intensity
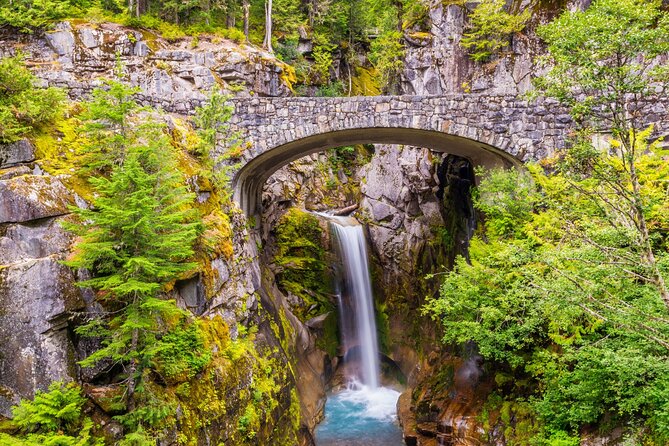
Stop 6: Comet Falls (nearly 320 feet, moderately challenging)
Comet Falls is a big one: nearly 320 feet, and you hike about 3.8 miles round trip to reach it. The trail follows Van Trump Creek and includes smaller waterfalls along the way before the main cascade.
This is a good stop when you want payoff. The name comes from the stream shape—narrow and plunging, widening into mist as it falls. The audio here helps you anticipate what you’ll see, so you’re not just walking into fog with no idea what’s coming.
Stop 7: Christine Falls Bridge (easy, iconic, photo-friendly)
Christine Falls drops 69 feet in two tiers, framed by a historic stone bridge. The viewpoint is close, and the stop is known for a short, easy walk from the parking area.
This pairing is handy. Do Comet if you want effort for height and drama. Do Christine if you want the classic Mount Rainier look without committing to a longer hike that could eat half your day.
Ricksecker Point, Frog Heaven, and the Tatoosh Range
Stop 8: Ricksecker Point (panoramic pullout)
Ricksecker Point is along a one-way road and gives sweeping views of Mount Rainier, the Nisqually Valley, and the Tatoosh Range. It’s a strong photography pause because clear days can stretch the view far into the distance.
Tip: pull over and take a slow lap with your eyes first. The audio tends to help you connect glaciers and peaks to what you’re seeing, which can make a photo session feel more intentional.
Stop 9: Frog Heaven (wetland life near the entrance)
Frog Heaven is a small wetland area near the Nisqually Entrance. It’s known for amphibians, especially frogs, and you may hear them more in spring and summer. The audio frames it as part of a delicate wetland ecosystem, with small ponds and marshy ground that support wildlife.
This is a nice break from waterfalls. It’s also a reminder that the park isn’t just rock and snow—it’s water, soil, and living things doing their job quietly.
Stop 10: Tatoosh Range (views and peaks south of Rainier)
The Tatoosh Range is rugged and jagged, and it shows up in views from Paradise and Reflection Lakes. The audio points out prominent peaks like Pinnacle Peak, Unicorn Peak, and Castle Peak, plus the idea that summer wildflower meadows can make this range look even brighter.
Even if you don’t hike those peaks, understanding the range helps your eyes track direction while you drive.
Narada Falls: one of the easiest big waterfalls
Narada Falls is often a top stop because it’s popular and relatively easy to access compared with deeper hikes. The falls drop about 188 feet in two tiers, and the mist can create rainbows on sunny days. You reach a viewpoint via a short but steep trail down near the falls.
This is a good stop for a “waterfall fix” without committing to a long day hike. But do plan for steepness on the path. If you’re wearing shoes that aren’t great for slippery steps, you’ll feel it here.
Unicorn Peak and the Nisqually Vista Trail: when you’re ready for effort
Stop 11: Unicorn Peak (for experienced hikers and climbers)
Unicorn Peak is the highest point in the Tatoosh Range at 6,971 feet. The climb involves scrambling and some technical climbing, so it’s aimed at people with mountaineering skills rather than casual hiking.
Why include it in your plan? Because the audio helps you understand what you’re looking at when you see the peak from safer viewpoints. It turns a distant shape into a real destination with a sense of scale and difficulty.
Stop 12: Nisqually Vista Trail (1.2 miles, easy loop with glacier views)
Nisqually Vista Trail is a short, easy 1.2-mile loop beginning at the Paradise parking area. It’s focused on views of the Nisqually Glacier and the surrounding alpine scene, with wildflower meadows in season.
Interpretive signs help connect glacial features to the ecosystem, and the trail is described as year-round, including winter snowshoeing. If you want a hike that’s doable for many people but still feels “Alpine,” this is one to consider.
Inspiration Point and Reflection Lakes: the clear-weather payoff
Stop 13: Inspiration Point (roadside panorama)
Inspiration Point sits along the road to Paradise and gives panoramic views of the surrounding mountains, valleys, and glaciers. The audio cues views toward the Tatoosh Range and Mount Adams in the distance, with Mount Rainier as the dominant presence.
This is one of the best stops for photos because you don’t need to work for elevation. It’s also a smart place to slow down and let the day reset, especially if you’ve already done one hike.
Stop 14: Reflection Lakes (mirror-like lakes near Paradise road)
Reflection Lakes is a set of small, pristine lakes near the Paradise area known for mirror-like reflections. The audio here helps you time your pauses—watching for light and stillness rather than racing to the next car pull-off.
If the weather is flat and misty, you may get soft, atmospheric results even without perfect mirrors. But you’ll do best when conditions cooperate.
What makes this audio tour worth your time on a first Mount Rainier visit
The best part isn’t just that you hear facts. It’s that the tour helps you turn driving time into meaningful sightseeing. The GPS-based autoplay keeps you present, and the narration style blends humor with practical guidance like which spots deserve a pull-over.
It also gives you a better sense of how the park is layered:
- glacial water systems (Tahoma Creek)
- old-growth forest structure (Twin Firs Loop)
- history and orientation (Longmire Museum)
- waterfall intensity levels (Christine vs Comet vs Narada)
- viewpoint logic (Tatoosh Range, Ricksecker Point, Inspiration Point)
- season-based living landscapes (Frog Heaven, wildflower notes)
Another strength is pacing for real life. You can do short walks like Twin Firs Loop or Christine Falls, then stretch into longer hikes like Comet Falls if your legs are good. This flexibility is the difference between rushing through Mount Rainier and actually enjoying it.
Should you book this self-guided Mount Rainier audio tour?
Book it if:
- you want clear, real-time guidance while you drive
- you’re traveling in a small group (up to 8) and want one low group price
- you want offline audio so you can focus on scenery, not signal strength
- you like the idea of doing a few optional hikes without planning a strict itinerary
Skip it if:
- you plan to do many long, demanding hikes back-to-back and you need something more structured than a driving audio route
- you know your phone battery is unreliable and you don’t want to bother charging (this tour depends on a working device)
If your goal is to see Mount Rainier highlights in a way that feels guided, without paying per person or locking yourself into ranger-bus schedules, this is a strong value. Just charge your phone, start early enough for parking, and treat the optional hikes like choices, not homework.