REVIEW · WASHINGTON
Ultimate Mount Rainier National Park Self-Guided Driving Tour
Book on Viator →Operated by Adventures with Action · Bookable on Viator
Mount Rainier gets easier with audio in your car. This self-guided drive strings together about 70 miles of stops and 85+ location-triggered stories, so you can focus on scenery instead of reading turn-by-turn signs. I like that the narration kicks in when you’re near each spot, and you can pause or skip without losing the flow.
Two things I really like: first, the hands-free, GPS-based audio means you don’t have to tap your phone every few minutes. Second, the included route works offline after download, which matters fast in Mount Rainier where cell service can vanish.
One consideration: you still need a standard park entrance pass, and you must download the tour on strong Wi‑Fi/cellular before you lose signal. If you start with the wrong direction/version, timing can feel off too.
In This Review
- Key highlights before you go
- Price and value: $14.99 per group adds up fast
- How the GPS audio actually helps (and where it can trip you up)
- Timing basics: a 2–3 hour drive that fits real schedules
- Stop-by-stop: Nisqually Entrance to Longmire old-growth waterfall country
- Nisqually Entrance (photo arch + first stories)
- Tahoma Creek (small creek, big ecosystem)
- Twin Firs Loop Trail (an easy taste of old growth)
- Longmire Historic District (food, bathrooms, and a real base)
- Carter Falls Trailhead (moderate walk, optional overlook)
- Comet Falls (the chase for the big waterfall)
- Christine Falls Bridge (stonework + a canyon drop)
- Ricksecker Point (views and a bit of past danger)
- Frog Heaven (wetlands + frog life cycles)
- Tatoosh Range viewpoints (Pinnacle Peak, Plummer Peak, Unicorn Peak)
- Puyallup (first inhabitants and place names)
- Paradise and the Narada–Reflection Lakes zone: short walks with big mountain moments
- Narada Falls (from lookout to trail view)
- Nisqually Vista Trail (easy, quick, crowd-favorite)
- Paradise facilities (snacks, water, and more parking)
- Inspiration Point and Reflection Lakes (the mountain mirror)
- Stevens Peak reference (Hazard Stevens)
- Trail add-ons that the drive supports: Snow Lake, Box Canyon, Wonderland
- Snow Lake Trail (steep but shortish)
- Picture Frame Falls (don’t expect a real waterfall)
- Box Canyon (paved loop + a glacier rift view)
- Wonderland Trail (why it was built)
- Ohanapecosh and Tipsoo: older forests, hot springs connection, and quieter water
- Backbone Ridge (strenuous, long views)
- Grove of the Patriarchs (currently closed)
- Ohanapecosh Visitor Center (hot springs story tied to Longmire)
- Shriner Peak Trailhead (autumn only in practice)
- Tipsoo Lake (pause by the water)
- White River corridor and Sunrise Rim: timing for sunrise vibes
- White River (the river has changed)
- Owyhigh Lakes Trail (shade, level ground, longer time)
- Sunrise Point (sunrise is the point)
- Sunrise Rim Trail (1-mile warm-up or wind-down)
- Practical pitfalls: roads, seasons, and matching your route direction
- Should you book this Mount Rainier driving audio tour?
- FAQ
- How long is the self-guided driving tour?
- What does it cost, and how many people can use one purchase?
- What language is the audio tour offered in?
- Do I need a park pass to visit Mount Rainier?
- Does it work without cell service or Wi‑Fi?
- How do I start the tour once I’m at the park?
- How does the audio know when to play?
- Can I use my car speakers for the audio?
- What if the app sounds like it’s behind where we are?
- Are there any road closures I should be aware of?
Key highlights before you go
- GPS-triggered audio plays when you’re at the right spot, no button pushing
- Offline maps + saved route so you can keep driving even with no signal
- Value per car: $14.99 for up to 4 people, not per person
- Smart mix of short walks and big-hike options so you can scale the day to your legs
- Old-growth forest, waterfalls, and named viewpoints with the “why” behind each place
- You control pacing: start anytime, pause for photos, and jump in and out of short trails
Price and value: $14.99 per group adds up fast
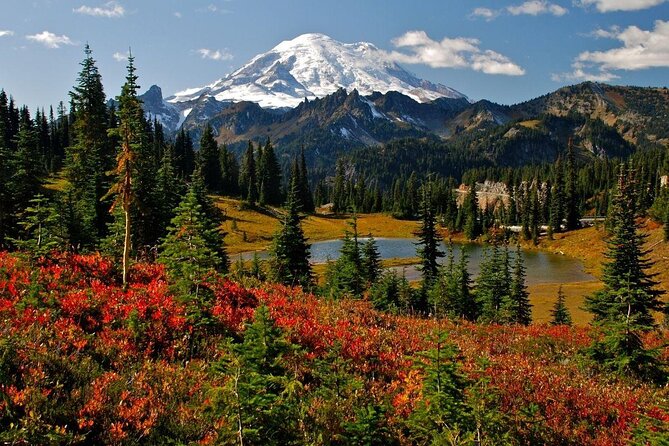
At $14.99 per group (up to 4), this tour is priced more like a coffee stop than an all-day guided excursion. The real value is not just convenience. You get a structure for a big, scattered park that many people try to “wing” and end up missing key viewpoints or taking the wrong turn because parking and access are a bit chaotic.
Think of it this way: a guided tour often charges per person and still can’t guarantee you’ll want every stop. This setup lets you stop when you want. If you want a quick look at a waterfall and then get back in the car, you can. If you want the longer hike at a specific trailhead, the route supports that too.
Also, the tour includes lifetime access with no expiry. That’s useful because Mount Rainier trips often split into “first time” and “return later when roads open” plans. You’re not locked into one visit date.
You can also read our reviews of more tours and experiences in Washington.

How the GPS audio actually helps (and where it can trip you up)
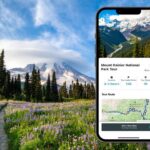
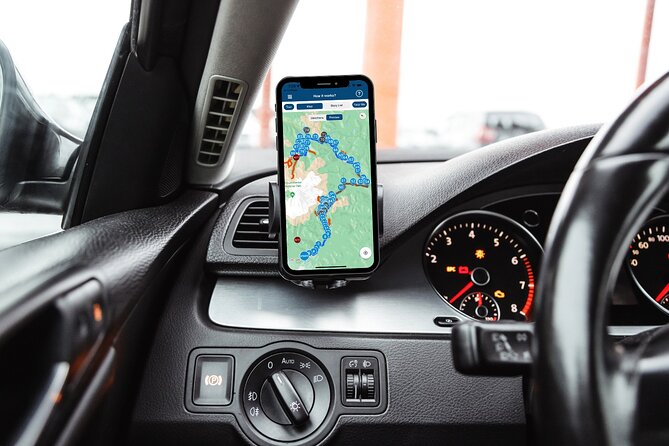
The tour is self-guided. No one meets you at the start. Instead, you open the Action app once you’re onsite and begin at the first story point for your planned starting direction.
Here’s what you’ll notice quickly:
- The audio is location-triggered, so it tends to start right when you’re pulling in or walking a short distance.
- It’s hands-free once you start it, which is great when you’re parking, walking, or balancing a camera.
- You can pause and resume for snacks, bathrooms, and photo breaks.
Where you need to be careful:
- Download before signal drops. The park can have no Wi‑Fi or cell coverage, so the tour app must be downloaded while you still have strong connection.
- Use the correct tour direction/version. One downside reported is the narration felt behind the drive. That’s often what happens when you start from a different entrance than the app expects. If your timing seems off, stop, confirm the direction you selected, and restart rather than guessing.
For car audio, setup options are included: Bluetooth, USB, or AUX, and audio playback can work with Apple CarPlay (Android Auto support is on the way). For walking, headphones can make narration easier to hear.
Timing basics: a 2–3 hour drive that fits real schedules
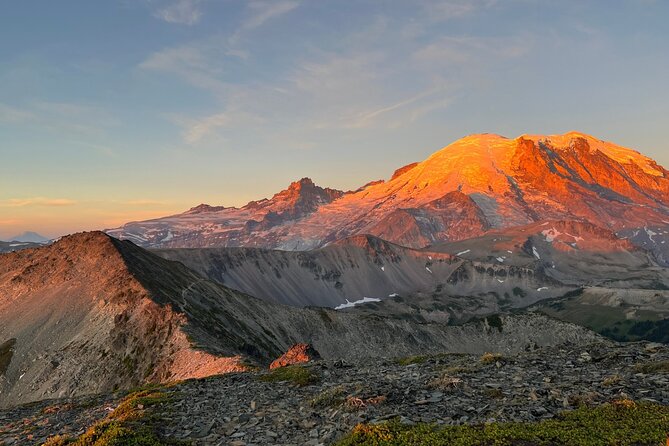
The route is about 2 to 3 hours for the main flow, but your time in the park depends on which trailheads you add and how much you linger at viewpoints.
The operating window listed is 6:00 AM to 9:00 PM (Monday through Sunday, through the listed end date). If you’re doing this as part of a longer Mount Rainier day, I’d aim for morning or late afternoon when:
- lighting is better for waterfalls and faces of the mountain
- parking feels more manageable
Weather matters. In colder shoulder seasons, you may hit ice or road conditions that change what’s realistically doable.
Stop-by-stop: Nisqually Entrance to Longmire old-growth waterfall country
This first stretch is for when you want classic Mount Rainier texture fast: entrances, rivers, and easy walks that lead to big payoffs.
Nisqually Entrance (photo arch + first stories)
You start at the Nisqually Entrance, with a photo-friendly arch and the park entrance station right beyond it. The audio pushes you to pause there, then continues as the drive moves into the park’s forested areas.
A nice detail here is the focus on the water system. The stories tie the Nisqually River and nearby creeks to why the whole area stays green and alive year-round.
Tahoma Creek (small creek, big ecosystem)
Next is Tahoma Creek. It doesn’t look dramatic from the road, but that’s the point. Tributaries like this are why the park has constant moisture and habitat, not just seasonal snowmelt.
Twin Firs Loop Trail (an easy taste of old growth)
Then you hit Twin Firs Loop Trail, a short half-mile loop. It’s labeled easy and timed at about ten minutes, making it perfect for a quick stretch without committing to a longer hike.
Old growth is hard to find in much of the U.S., so this is one of those moments where ten minutes can teach you more than an hour of guessing from photos.
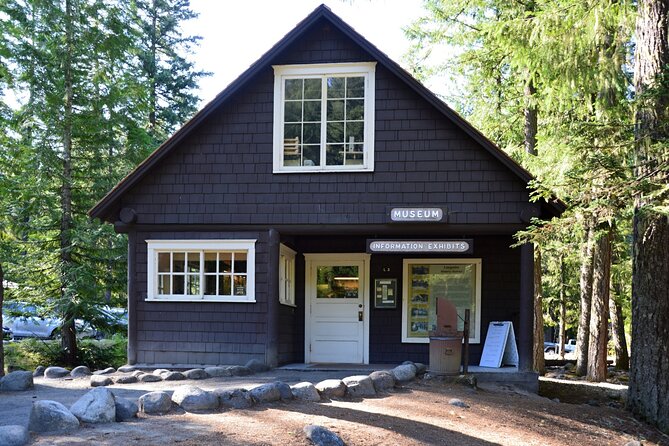
Longmire Historic District (food, bathrooms, and a real base)
Longmire Museum is your practical pit stop. You get:
- bathrooms
- food options
- a small museum context
- access to nearby trails
This is a good place to reset. If you’ve been driving straight through, Longmire helps you shift from “driving tour” to “park visit.”
Carter Falls Trailhead (moderate walk, optional overlook)
At Carter Falls Trail, you have a moderate 1.5-mile option to a waterfall in the woods. If you don’t feel like hiking that day, the audio also points out an overlook of the Nisqually River from nearby.
Comet Falls (the chase for the big waterfall)
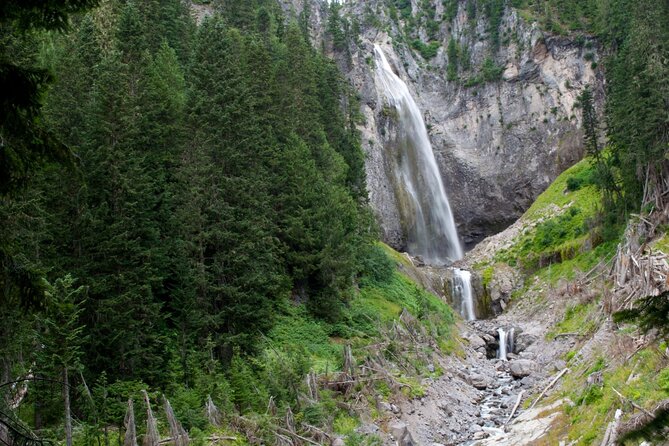
Then comes the hard-hitting stop: Comet Falls. The hike is 4 miles (described as challenging) and leads to a 301-foot waterfall. The story connects the name to the visual shape, like a comet tail flash of white.
If you only pick one “bigger hike” early, this is the kind.
Christine Falls Bridge (stonework + a canyon drop)
Next is Christine Falls Bridge, built in 1927, noted for rustic stonework that blends into the landscape. The audio pairs the bridge view with what’s below: a 60-foot waterfall into Van Trump Creek Canyon.
Even if you skip the longer hikes later, these bridge-and-waterfall stops make the drive feel like a complete story, not random pull-offs.
Ricksecker Point (views and a bit of past danger)
At Ricksecker Point, you pull into a parking area for mountain and forest views. The story includes a safety angle too: this area used to be more dangerous, starting around 1910, which adds perspective to why modern railings and rock walls exist.
Frog Heaven (wetlands + frog life cycles)
Then you roll into Frog Heaven, a road-area nickname with a purpose. The stories point out that the lakes and wetlands support five frog species, and that the food chain includes predators that rely on moist conditions for reproduction.
If you like nature details more than postcard views, this stop hits.
Tatoosh Range viewpoints (Pinnacle Peak, Plummer Peak, Unicorn Peak)
As you drive through the Tatoosh Range section, the audio names peaks like Pinnacle Peak and Plummer Peak, with elevations included for at least one of them. It also calls out Unicorn Peak as the tallest you can spot farther out.
These peaks matter because Mount Rainier is not alone up here. It’s a whole skyline of high ground.
Puyallup (first inhabitants and place names)
The stop labeled Puyallup shares a language meaning: people from the bend at the bottom of the river. It’s a short stop, but it adds a human layer beyond geology and hiking.
Paradise and the Narada–Reflection Lakes zone: short walks with big mountain moments
Once the tour reaches the Paradise area, you shift into more classic Mount Rainier viewpoints. This is where many people want photos, and it’s also where the audio helps you understand what you’re actually looking at.
Narada Falls (from lookout to trail view)
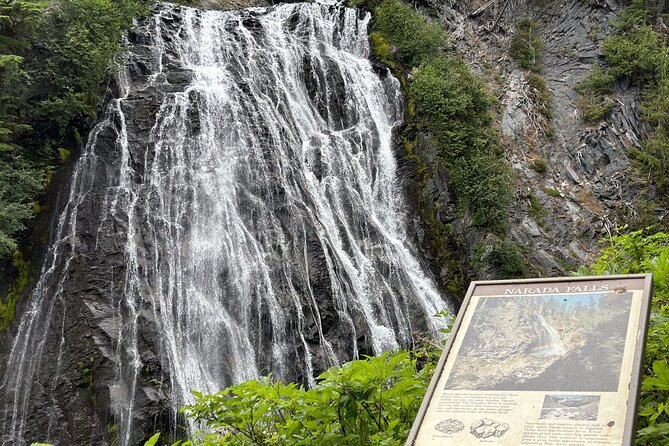
After parking in the Tatoosh/Narada area, the audio instructs you to walk a brief trail to Narada Falls. The waterfall is described as 168 feet.
The name comes from Arthur F. Knight of Tacoma and his connection to the Theosophical Society of Western Washington. It’s the kind of story that makes a waterfall name feel less random.
Nisqually Vista Trail (easy, quick, crowd-favorite)
Next up is Nisqually Vista Trail, a 1-mile hike described as crowd-favorite because it’s easy and fast while still delivering views of Mount Rainier. The paved journey is roughly 30 minutes.
If the parking area is full, the audio points you to extra parking later on. If you’d rather keep moving, you can skip this and just continue with the drive.
Paradise facilities (snacks, water, and more parking)
The audio calls out Paradise as a place for snacks, water, and a sit-down dining room, plus additional parking for trails like Myrtle Falls.
This stop is practical. It helps you plan your day instead of hunting down services during peak time.
Inspiration Point and Reflection Lakes (the mountain mirror)
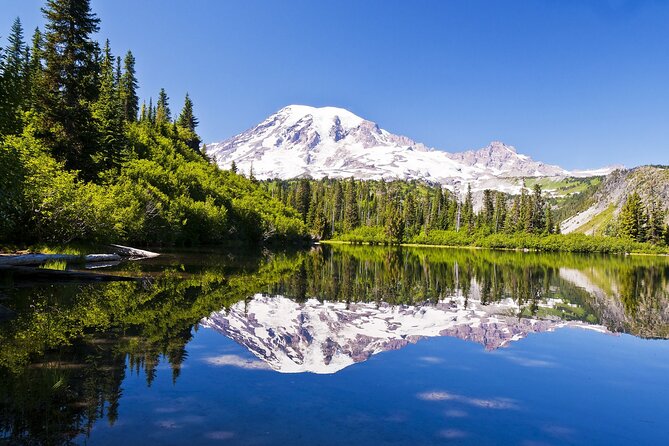
At Inspiration Point, the audio notes an accessible vista with a large parking lot. Then you get Reflection Lake, which the guide describes as a glacial lake that can mirror the summit.
The key tip: views are best when there’s no wind. That’s useful advice for timing your photos instead of just showing up and hoping.
The narration also points out the summit alignment: when conditions are right, you can see two Mount Rainier images.
Stevens Peak reference (Hazard Stevens)
The story then identifies Stevens Peak as 6,560 feet, named for Hazard Stevens, one of the first European summiters along with P.B. Van Trump. The humor about the name is yours to enjoy as you watch the mountain skyline.
Trail add-ons that the drive supports: Snow Lake, Box Canyon, Wonderland
This section matters if you want hiking without turning your day into a complicated plan.
Snow Lake Trail (steep but shortish)
The Snow Lake Trail is described as moderately challenging: 2.2 miles out and back, a little over an hour, with some steepness and a payoff of two pristine wilderness lakes.
If you want a real hike but not a half-day commitment, this is a good option.
Picture Frame Falls (don’t expect a real waterfall)
The audio calls out Picture Frame Falls and clarifies it’s not technically a real waterfall. The “picture frame” concept is the main attraction, framing a cascade view with vegetation.
This is a helpful kind of transparency. It saves you from standing in the wrong place hoping for something dramatic.
Box Canyon (paved loop + a glacier rift view)
Box Canyon is a short half-mile paved loop with views of a rift formed by shifting glaciers. It also connects to the longer Wonderland Trail, described as a 93-mile circuit.
If your legs are good, you get the link to the big dream trail. If your legs aren’t, you still get the loop.
Wonderland Trail (why it was built)
The audio explains Wonderland’s origin: started in 1907 for fire-road needs when there weren’t enough ways to protect forest areas during drier seasons. If you care about how parks manage risk and access, this context is worth the time.
Ohanapecosh and Tipsoo: older forests, hot springs connection, and quieter water
Not all Mount Rainier is about the biggest views. This segment leans into different terrain and less crowded pacing.
Backbone Ridge (strenuous, long views)
Backbone Ridge is described as strenuous: 6.6 miles round trip with about a 3-hour expectation and rough terrain. It overlooks Tatoosh Wilderness.
This is a “serious hiker” stop. If you’re not ready for steep and uneven sections, it’s one to skip and save energy for shorter lakes or viewpoints.
Grove of the Patriarchs (currently closed)
The Grove of the Patriarchs is an easy 1-mile trail through big old-growth trees, under an hour, but the tour notes it’s currently closed for maintenance. The story behind it includes Scottish botanist David Douglas and his collecting work.
Even if you can’t walk it, the narration is still a good reminder that this park’s trees have names and chapters attached.
Ohanapecosh Visitor Center (hot springs story tied to Longmire)
At Ohanapecosh Visitor Center, the story explains the name meaning: standing at the edge, near a river. It also ties this area to James Longmire, who discovered hot springs.
This is the stop where you can slow down and use facilities. It also helps you place “Longmire” beyond just a museum district.
Shriner Peak Trailhead (autumn only in practice)
Shriner Peak Trail is presented as one of the loneliest trails in the park. In summer it’s a no-go, but in autumn the 8.5-mile hike can be worth it for a six-hour climb with panoramic views. The peak includes the park’s oldest fire lookout.
Plan this only if you’re traveling in that season and you’re actually prepared for a long, steep day.
Tipsoo Lake (pause by the water)
At Tipsoo Lake, the audio focuses on a loop walk and a chance to smell the flowers and look for trout in the water. It also notes that Mt. Rainier lakes did not originally host trout, which adds a small conservation and ecological angle to an otherwise relaxed stop.
White River corridor and Sunrise Rim: timing for sunrise vibes
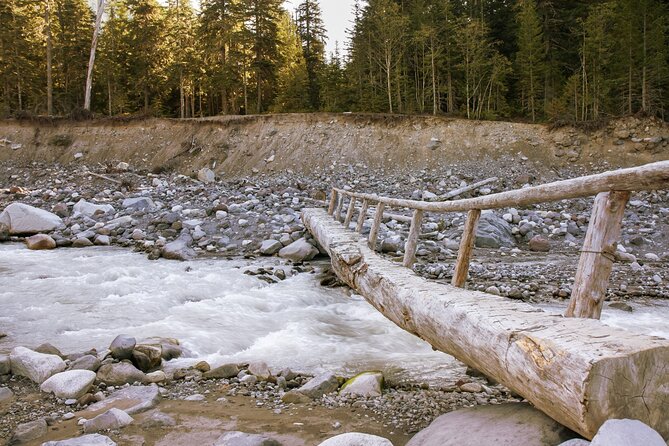
The last stretch brings you toward sunrise-type viewpoints and another river corridor.
White River (the river has changed)
The audio notes you’re driving alongside the White River, and includes the idea that you never step into the same river twice, because the flow has been changed by humans and elements over centuries.
That kind of story is useful because it shapes how you look at the valley. It’s not just scenery. It’s an engineered and evolving system.
Owyhigh Lakes Trail (shade, level ground, longer time)
The Owyhigh Lakes Trail is described as 7 miles, about four hours, mostly level with plenty of shade. It’s named after Yakama Chief Owhi, connected to the 1858 Battle of the Spokane Plains.
This is a strong option when you want a longer hike that’s not all brutal steepness.
Sunrise Point (sunrise is the point)
At Sunrise Point (6,120 feet), the audio describes it as perhaps the best place in the park to watch sunrise. The overlook was built by the Civilian Conservation Corps, part of the New Deal effort during the Great Depression.
Even if you’re not an early-bird sunrise devotee, the story gives the overlook a purpose beyond views.
Sunrise Rim Trail (1-mile warm-up or wind-down)
Finally, Sunrise Rim Trail is a one-mile option. The guide also mentions a connection choice: if you want more challenge, you can bypass the rim and head toward Wonderland on the Mount Fremont Trail (described as five and a half miles uphill terrain in just under three hours).
Practical pitfalls: roads, seasons, and matching your route direction
This kind of driving tour is easy, but Mount Rainier has real-world friction.
1) Park access isn’t included. You’ll still need a standard entrance pass, and some roads may need seasonal reservations. Plan on adding that cost and time at entry.
2) Road closures can change drive time. The tour notes that from September 2–30, 2025, Stevens Canyon Road (intersection to SR 410) and SR 123 will be closed, causing a 3–4 hour detour for travelers moving between Stevens Canyon Entrance and White River Entrance / Sunrise Corridor. If your trip lands in that window, don’t plan a tight schedule.
3) Seasonal “open” realities. A Mount Rainier visit can be cut short by winter ice or shoulder-season road limits. The tour still gives you the structure, but the park may limit what you can reach.
4) Timing hiccup when direction is wrong. If narration feels delayed, double-check that you started the version meant for your entrance direction.
5) Some stops may be closed. Grove of the Patriarchs is specifically noted as closed for maintenance. Build flexibility into your plan so you don’t resent missing one short walk.
Should you book this Mount Rainier driving audio tour?
Book it if you want a self-paced, story-rich way to experience Mount Rainier without hiring a guide or committing to a rigid schedule. The GPS-triggered audio and the fact it works offline are the two big reasons this makes sense. You also get value because the price is per group, and you can add hikes like Snow Lake or Box Canyon without needing to map everything yourself.
Skip it if you’re the kind of traveler who wants total spontaneity without any structured stop plan, or if you’re likely to arrive without downloading the app first. Also, if you only want the park’s absolute highlights and nothing else, you might find a simpler plan more efficient.
My bottom line: if you’re planning a drive through Mount Rainier and you want the place to feel understandable, not just pretty, this is a smart buy.
FAQ
How long is the self-guided driving tour?
It’s approximately 2 to 3 hours to complete.
What does it cost, and how many people can use one purchase?
It costs $14.99 per group, and it’s for up to 4 people.
What language is the audio tour offered in?
The tour is offered in English.
Do I need a park pass to visit Mount Rainier?
Yes. A standard Mount Rainier entrance pass is required, and it is not included with the tour.
Does it work without cell service or Wi‑Fi?
Yes. You’ll download the tour while you have strong Wi‑Fi/cellular, and it then works offline.
How do I start the tour once I’m at the park?
You open Action’s audio tour guide app onsite, choose the tour version that matches your planned starting point and direction, and start at the first story point. The audio begins automatically.
How does the audio know when to play?
Audio stories play based on your location, and they’re designed to trigger as you approach each stop.
Can I use my car speakers for the audio?
Yes. The setup supports Bluetooth, USB, or AUX. Audio playback is compatible with Apple CarPlay (Android Auto support is described as on the way).
What if the app sounds like it’s behind where we are?
This is often linked to starting from the wrong entrance or direction. If it feels late, make sure you launched the correct version for your starting point and direction.
Are there any road closures I should be aware of?
The tour notes a planned closure from September 2–30, 2025 involving Stevens Canyon Road and SR 123, with a 3–4 hour detour for travelers between Stevens Canyon Entrance and White River Entrance / Sunrise Corridor.