REVIEW · UTAH
Zion National Park Self-Guided Driving & Shuttling Tour
Book on Viator →Operated by Travel with Action · Bookable on Viator
Zion hits different with your own audio guide. This self-guided Zion National Park driving and shuttling tour lets you cruise the scenic corridor while a hands-free narration keys off where you are, with offline maps built in for cell-dead canyons. The whole thing is designed for flexibility, so you can linger for photos or do the short viewpoints without getting stuck on a fixed bus schedule.
I particularly like the practical “you can actually do this” setup: it’s good value per group (up to 4 in your car) and it plays automatically as you move, so you’re not constantly tapping your phone. The main drawback to plan around is that the experience depends on setup quality: you need to download in strong Wi-Fi/cellular first, and if you frequently restart or bounce between shuttle stops, you may lose your place or hear repeats.
In This Review
- Key Highlights You’ll Care About
- What This Self-Guided Zion Tour Actually Gives You
- Price and Value: Why $16.99 per Group Can Make Sense
- Pre-Trip Setup: Download the Tour Where Signal Still Works
- Driving vs Shuttle in Zion: Seasonal Rules That Change Your Route
- Starting at Zion Canyon Visitor Center: Get Your Bearings Fast
- Canyon Junction Bridge: Sunset Vibes and the Main Fork in the Road
- Pa’rus Trail and Watchman Trail: Easy Feet, Big Views
- Court of the Patriarchs: Three Peaks, One Name Change
- Zion’s Human Story: From Settling to Heavy Visitor Pressure
- Emerald Pools: Where “Short Walk” Still Means Heat Management
- Angel’s Landing: The View Is Famous for a Reason (and it takes permits)
- The Grotto Picnic Area: Facilities, then trails
- Weeping Rock Trail: Water That Doesn’t Need a Power Source
- Big Bend Viewpoint: Great White Throne and Angel’s Landing in one frame
- Temple of Sinawava Trail and the Narrows Approach
- East Temple: 1,700 Feet of Layered Color
- Zion Scenic Drive Viewpoint 2: Why the Name Zion Stuck
- Zion-Mount Carmel Tunnel: Headlights On, Then Don’t Stop
- Canyon Overlook Trail: Short, Easy, and Worth It
- Altar of Sacrifice and Checkerboard Mesa: Two Stops With Stories
- East Entrance Ranger Station: Ending Where the Canyon Keeps Going
- Who This Tour Suits Best
- My Take: Should You Book This Zion Audio Tour
- FAQ
- FAQ
- Do I need cell service to use the audio tour?
- How long does the Zion tour take?
- Is the tour per person or per car?
- Are park entrance fees included?
- Where do I start the self-guided tour?
- Can I use this tour while riding the shuttle?
- Can I drive Zion’s valley floor scenic drive in every season?
- Do I need permits for Angels Landing or the Narrows?
- Can I cancel and get a refund?
Key Highlights You’ll Care About
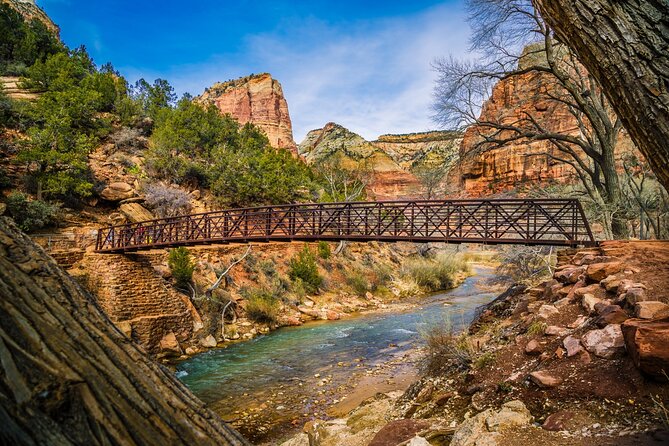
- Offline, location-triggered audio that plays hands-free as you follow the route
- $16.99 per group (up to 4), so your cost is about your car, not per person
- 25+ miles of stops with short walks and big pull-offs, ideal if you want views without long hikes
- Works while driving or riding the Zion shuttle (especially important when private cars are restricted)
- Lifetime access, no expiry, so you can use it again later on future trips
What This Self-Guided Zion Tour Actually Gives You
Think of this as a smart audio companion for Zion’s main corridor. You’ll drive (or ride the shuttle) and hear stories that line up with where you are: viewpoints, short trails, and key canyon spots. It’s not a ranger-led walk where someone waits for you and answers every question. Instead, you follow audio cues to each interest point, with the narration starting on its own.
The practical beauty is that you control your pace. You can park, stretch, take photos, and then continue without worrying about the next person being slow. If you want to do only the easy walking segments, you still get plenty of payoff. If you want to aim toward heavier hikes like Angel’s Landing or the Narrows, the tour can point you in the direction, but you still need to follow park rules and permits on your own.
You can also read our reviews of more tours and experiences in Utah.


Price and Value: Why $16.99 per Group Can Make Sense
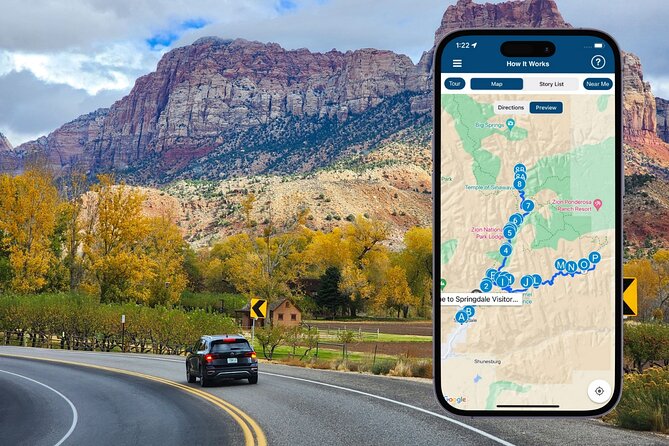
The price is $16.99 per group up to 4, which is a big deal if you’re traveling as a couple or small family. Many “audio guide” products are priced per person, which adds up fast at national parks. Here, if you put everyone in the same car, your per-person cost drops sharply.
Also, you’re not paying extra for each stop. The itinerary is built around free-to-access viewpoints and trails once you’re inside the park. One catch: park passes aren’t included, so make sure you’ve handled that separately before you go in. If you’re already planning to buy a Zion entrance pass, this tour becomes a low-cost way to turn a drive into a guided-by-a-voice experience.
Pre-Trip Setup: Download the Tour Where Signal Still Works

This is the most important step, and it’s worth treating seriously. After booking, you’ll get an email/text with instructions and a password, and you’ll use a separate Action app to run the audio tour. The app needs you to download the tour while you’re in strong Wi-Fi/cellular. After that, it works offline, which is exactly what you want in Zion’s canyons.
Two habits make this smoother:
- Download before you arrive if you can, then just start it once onsite.
- When you’re moving, keep the app running normally rather than constantly restarting.
One lesson from real-world usage: national parks can be signal-hostile, and if you mess up the initial download, the “auto-play” magic can turn into fiddly frustration. Get the download right, and you’ll spend your time on the views instead of troubleshooting.
Driving vs Shuttle in Zion: Seasonal Rules That Change Your Route
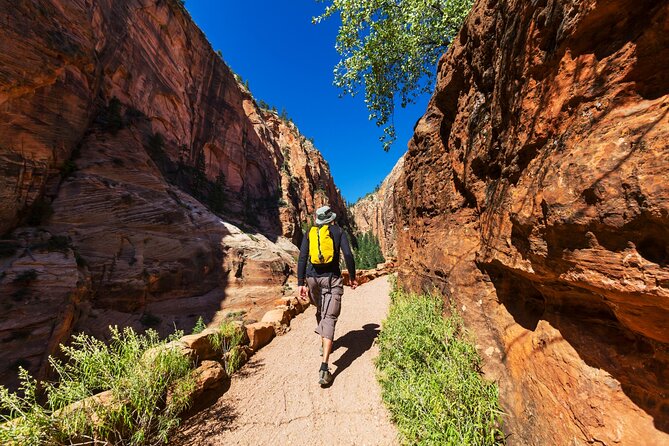
Zion has a real rhythm shift depending on the season. From March to November, private vehicles aren’t allowed on Zion’s valley floor scenic drive, and you’ll need to use the park shuttle there. During select dates from December to February, driving may be permitted, but it’s not guaranteed year-round.
The good news: this audio tour is built for both modes. You can enjoy the same narration while driving where allowed, and while riding the shuttle where it’s required. When you’re on the shuttle, plan on using headphones so the audio doesn’t compete with vehicle noise.
Also keep in mind that some hikes require permits. The tour itself doesn’t replace those permits; it just gives you the stories and orientation. The big ones called out include Angels Landing (permit via lottery) and some popular routes like the Narrows and Subway (permits also required).
Starting at Zion Canyon Visitor Center: Get Your Bearings Fast
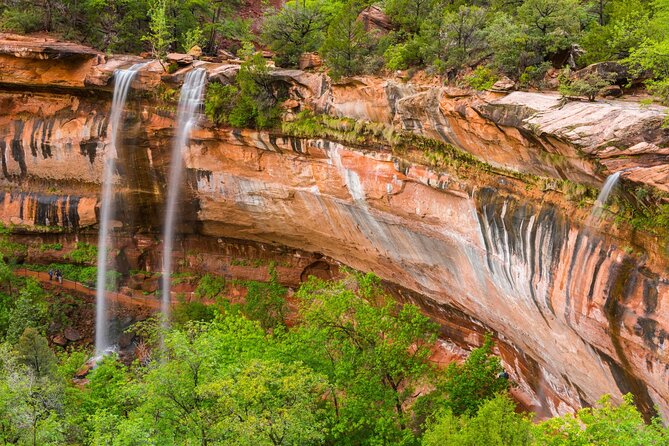
You start and end at the Zion Canyon Visitor Center (1 Zion Park Blvd, Springdale, UT 84767). The visitor center is open 8:00 AM to 5:00 PM daily.
In a self-guided setup, this matters because there’s no host meeting you. Nobody is waiting at the first point. You go to the starting location, open the app, and then the tour begins as you enter the first story’s point. From there, it moves you along with location-based cues.
A simple approach that works well:
- Arrive with enough daylight for your pace.
- Start the app at the first point.
- Follow the audio cues and pull-offs in order, staying mindful of Zion speed limits.
Canyon Junction Bridge: Sunset Vibes and the Main Fork in the Road
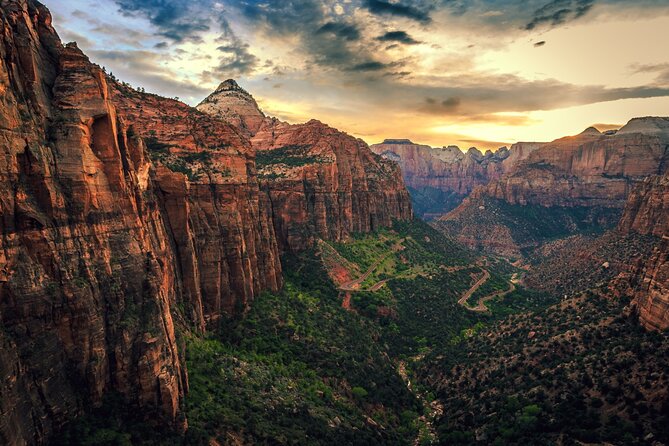
Canyon Junction Bridge is a strong opening act. You’ll get multiple things at once:
- It’s a great sunset spot, so if you’re visiting late, this is worth coming back to later.
- It offers wide views toward the Watchman and other mountain peaks.
- It’s where the route really splits in terms of what you want to do next.
The narration points out two options that shape your whole afternoon. If you want to head toward the Scenic Road side and key areas like the Narrows, Angel’s Landing, or the Emerald Pools, you’ll follow the left-turn guidance.
If you’re trying to keep the day relaxed, plan on making this your “view and orient” stop first. Then, when you know what kind of hiking energy you have, you decide how far you want to push.
Pa’rus Trail and Watchman Trail: Easy Feet, Big Views
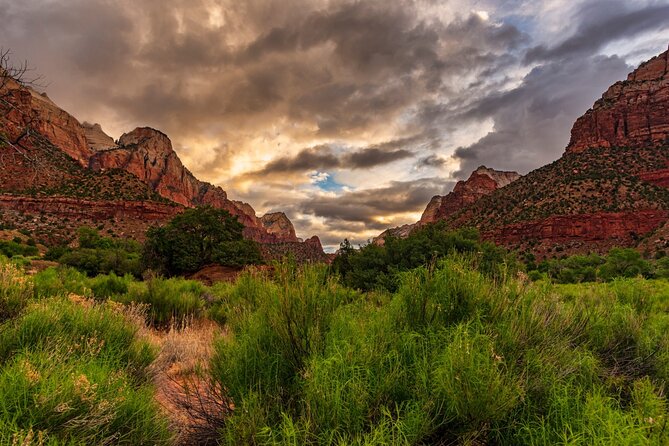
Right around the bridge area, the tour flags quick trail entrances.
- The Pa’rus Trail starts from a path on the left just before the bridge.
- The Watchman Trail begins just after the bridge.
These are the types of hikes that work when you want to feel the park without committing to a full day of ascent. Even if you don’t leave the car much, these short stretches give you a different angle on Zion, and the stories help you understand what you’re looking at instead of just snapping photos and moving on.
Court of the Patriarchs: Three Peaks, One Name Change

When you get to Court of the Patriarchs, those three mountains are the iconic trio people picture when they think of Zion Canyon. The narration connects the name to a local Christian minister who tied the peaks to Abraham, Isaac, and Jacob (left to right).
This stop also helps you read the canyon better. Once you know what names you’re hearing, you can start spotting features faster. That makes the rest of the drive feel less like wandering and more like recognizing landmarks.
Zion’s Human Story: From Settling to Heavy Visitor Pressure
One of the most interesting parts of this audio experience is how it connects geology to people. You’ll hear about earlier inhabitants, including references to Ice Age hunters (with the point that details are limited), and then shifting toward settled life around 300 BCE. The narration describes farming and crops like squash and corn, including a type of corn associated with the Fremont that could survive cold and drought and thrive even at higher elevations.
Then it pivots forward to the park era. It notes that the park service works hard to keep Zion natural and untouched while managing massive annual visitation, and it contrasts that with early-1900s realities when development came partly because the area wasn’t yet a major money-maker.
This kind of context is practical. It helps you understand why some places look carefully preserved while others carry signs of infrastructure and visitor management.
Emerald Pools: Where “Short Walk” Still Means Heat Management
At Emerald Pools, the tour gives you two basic safety reminders that are easy to ignore—until you need them.
1) Bring lots of water. Heat in Utah can wear you down fast, and sun-stroke or heat-stroke can end your day early.
2) Don’t overtax yourself. Elevation and conditions can make hikes harder than you expect, even if they look short on a map.
The Emerald Pools area is built for rewarding walking: waterfalls and a hanging garden atmosphere show up as you move through the area. The trick is pacing. If you treat it like a quick stroll in the shade, you’ll likely be fine. If you rush and forget water, you’ll pay for it.
Angel’s Landing: The View Is Famous for a Reason (and it takes permits)
The tour’s Angel’s Landing section is basically a motivational warning wrapped in awe. It frames this hike as a major adrenaline experience with views people describe as hard to match.
Here’s what to do with that info: treat Angel’s Landing as a plan, not an “if we feel like it” detour. The tour notes that Angels Landing requires a permit via lottery, which means your schedule and chances need to line up ahead of time.
If you don’t have the permit, you can still enjoy the surrounding pull-offs and viewpoints. Just don’t assume you can do the full hike without the required permission.
The Grotto Picnic Area: Facilities, then trails
At the Grotto Picnic Area, you’ll see what’s meant for park breaks: picnic tables, restrooms, and fire grates. But the point of this stop is what’s around it—trail access and the chance to regroup.
If your group includes different hiking styles, this kind of place is a lifesaver. Someone can refuel while someone else takes a short walk, and you can all meet back up near the facilities.
Weeping Rock Trail: Water That Doesn’t Need a Power Source
Weeping Rock Trail is a quick stop with a clear payoff: a continuous stream of water trickles down the face. It’s the kind of moment that makes Zion feel alive even when you’re just moving between viewpoints.
Because it’s relatively short, it also works as a good “energy reset” if you’ve spent the morning driving or riding shuttle and need a stretch.
Big Bend Viewpoint: Great White Throne and Angel’s Landing in one frame
As you round the Big Bend of the Virgin River, the tour guides you to a viewpoint that sets you up for postcard views. You’ll see the Great White Throne and the towering peak of Angel’s Landing.
This stop is valuable even if you don’t plan to hike Angel’s Landing that day. It gives you scale—how tall the canyon walls are, how the river cuts through the rock, and why the climbs feel so dramatic.
Temple of Sinawava Trail and the Narrows Approach
To see the Narrows, the tour points you to follow the paved Riverwalk all the way to the end. The narration calls it a flat, easy walk with greenery and towering natural “skyscrapers” feeling around you.
But it also flags the Temple of Sinawava idea first, so you understand why this spot matters. Again: if you’re serious about the Narrows, remember permits are required for popular times, and you’ll need to manage your plan around that.
If you’re not doing the Narrows hike, this still works as a peaceful walk. The area feels less like an overlook and more like an entry into the canyon world.
East Temple: 1,700 Feet of Layered Color
The East Temple stop is about height and the look of the rock. The tour notes it rises to about 1,700 feet and points out that the cliffs aren’t all one color.
You’ll hear the explanation that the cliffs reflect rock from different eras in the earth’s history. That’s more than trivia. Once you understand the “why” behind the colors, you’ll start seeing layer changes and erosion patterns more clearly across Zion.
Zion Scenic Drive Viewpoint 2: Why the Name Zion Stuck
At the next hairpin turn, you’ll reach another pull-off, labeled here as Zion scenic drive viewpoint 2. The narration tells the story of why the Mormons called this place Zion.
This is the kind of cultural note that makes a viewpoint more interesting. It connects your scenic stop to real people naming and re-naming the land.
Zion-Mount Carmel Tunnel: Headlights On, Then Don’t Stop
The tour warns you to turn on headlights for the Zion-Mount Carmel Tunnel. Then it adds a hard rule: stopping inside the tunnel is prohibited, even if you want photos.
This is a spot where self-guided audio can accidentally tempt you to break rules. Don’t. Keep moving, keep safe, and let the tunnel pass without trying to turn it into a photo-op. The canyon gives you plenty of other places to stop.
Canyon Overlook Trail: Short, Easy, and Worth It
Canyon Overlook Trail is described as one of East Zion’s finest, mainly because the views hit hard even though the trail itself is short and easy.
For me, this is the “best return on effort” kind of stop. If you’ve been driving and riding most of the day, a short trail like this gives you legs, air, and a payoff without wrecking the rest of your schedule.
Altar of Sacrifice and Checkerboard Mesa: Two Stops With Stories
Two of the later scenic points lean into visual clues and their interpretations.
- Altar of Sacrifice: you’ll notice rusty red streaks. Early Mormon pioneers thought it looked like blood from a sacrificial altar, though the narration mentions there’s a much less gruesome explanation.
- Checkerboard Mesa: as you get closer, you’ll see a grid-like pattern of criss-cross lines that resemble a checkerboard, which is where the name comes from.
These stops are great for anyone who likes to look closely. If you move slowly at the pull-offs, you’ll spot the features the stories are referring to, and the narration feels like it was made for your eyes.
East Entrance Ranger Station: Ending Where the Canyon Keeps Going
The tour wraps at the East Entrance Ranger Station. At this point, the value isn’t just that you made it through an audio route. It’s that you’ve built a mental map of Zion Canyon’s major features, from river access points to major cliff landmarks.
Even if you don’t go farther that day, you’ll understand Zion better for your next stop—whether you head into another park nearby or you return on a future trip.
Who This Tour Suits Best
This is a strong fit if you want:
- A self-guided way to see Zion without committing to a full ranger-led program
- Hands-free storytelling while you drive or ride the shuttle
- Short walks and viewpoint pull-offs that work even when your hiking time is limited
- A cost that makes sense for small groups, since it’s priced per car up to 4
It may be less ideal if you:
- Hate downloading apps and doing pre-trip setup
- Need a trip that works flawlessly even when you constantly restart and change devices
- Are planning to do permit-required hikes without having that permit lined up first
My Take: Should You Book This Zion Audio Tour
If you’re already going to spend time on Zion’s scenic corridor, this is an easy add-on. The offline audio and hands-free, location-based playback turn your drive and shuttle time into something smarter than random stopping. And the per-group pricing makes it one of the more affordable ways to get guided-style storytelling without a guide.
Book it if you want your day to feel guided but still flexible. Skip it only if you know you won’t do the setup download correctly or you want a true human-led hike plan with live questions and directions.
FAQ
FAQ
Do I need cell service to use the audio tour?
No. The tour uses offline maps after you download it while you have strong Wi-Fi/cellular. It’s designed for areas where signal can be weak.
How long does the Zion tour take?
The route is described as taking about 1 to 2 hours to complete.
Is the tour per person or per car?
It’s $16.99 per group (up to 4), so it’s priced per car/group rather than per individual.
Are park entrance fees included?
No. Park passes are not included, so you’ll need to arrange your Zion entry separately.
Where do I start the self-guided tour?
You start at the Zion Canyon Visitor Center, 1 Zion Park Blvd, Springdale, UT 84767. The tour also ends there.
Can I use this tour while riding the shuttle?
Yes. The tour is designed to be used while driving, and it also works when you’re on Zion’s shuttle with the right listening setup.
Can I drive Zion’s valley floor scenic drive in every season?
From March to November, private vehicles aren’t allowed on Zion’s valley floor scenic drive, and you’ll need the shuttle. The tour info notes that driving may be permitted during select December to February dates.
Do I need permits for Angels Landing or the Narrows?
The tour information states that a permit via lottery is required for Angels Landing, and some popular hikes like the Narrows also require permits.
Can I cancel and get a refund?
Yes. Free cancellation is available up to 24 hours in advance for a full refund.